|
|
|
|
|
A
Quick Lesson on Gravies
|
|
Anyone can make any kind of gravy, really, it's so simple,
Just cheat a little! Cheating means using cornstarch instead of flour. Do
be careful not to use too much cornstarch as it will make the gravy
starchy and WAY to thick! So stirring in a little at a time is a good way
to keep from using too much, and you get your gravy as thick or as thin as
you desire. So, how do you use cornstarch to make gravy out of any
thing? Simple. |
| First, taste
the broth base, (that which you are using for gravy) and
make sure it has all the flavor you want. if it doesn't,
doctor it up a little. This can be done using seasonings
such as sage, pepper, garlic, salt, etc.. |
|
| Second,
mix your cornstarch water mix in a
small bowl. Rule of thumb is *1 Tsp cornstarch to 2
Tsp cold water should make 1 cup gravy. COLD water is key
here, so don't go using hot or warm. Cold out of the
faucet is perfect. Put cornstarch in small bowl first,
then all the cold water. Stir and mash with a fork until
completely smooth. |
|
| Third, heat
the gravy base just to the point of boiling then remove
from heat. If your base has milk in it, heat until lightly
simmering then remove from heat. |
|
| Forth, when
the liquid stops bubbling, slowly
stir in the cornstarch mix until you have reached the
thickness you want. Making sure that the liquid completely
stops bubbling is an important or the gravy base won't
thicken. |
|
|
|
There, now your done! Gravy in minutes, tastes the way you
want, no lumps of flour, not too thick or too thin, just perfect! Remember, use a
little at a time and adjust according to YOUR desired thickness. This
means for 1 cup gravy, you should make your mix with 2 Tsp cornstarch and
4 Tsp cold water and add slowly while stirring. |
|
|
|
|
|
A
Quick Lesson on Quick-Breads |
| Basically, quick breads are the same except
for the flavor (banana, pumpkin, apple, etc.) So if you can make a simple basic
banana bread, you can make any quick bread. Just change your recipe
accordingly. Basic quick bread recipes include the same dry and moist
ingredients. They are as follows: |
Dry ingredients
- Flour
- Salt
- Baking Powder
- Sugar
- Optional Spices (Cinnamon, ground cloves, nutmeg, etc.)
|
Moist ingredients
- Eggs
- margarine, butter, oil, shortening or applesauce (for low fat)
- Bread Flavor (Banana, Pumpkin, carrot, zucchini, apple, etc..)
- Optional Extracts (Vanilla, lemon, almond, etc..)
|
| Example 1: Change a banana bread recipe to a pumpkin bread recipe.
Use the same amount of pumpkin puree in place of the bananas.
Since pumpkin is kind of bland without spices, don't forget to add
those spices. They would be the same as pumpkin pie spices. |
Example 2: Change a pumpkin bread recipe to an apple bread recipe.
Use the same amount of chopped or mashed apples in place of the
pumpkin puree. Use apple spices instead of the pumpkin spices. |
|
| Changing to
Low-fat: To make a quick bread (or cookies or cakes) low-fat, trade the butter,
margarine, oil, or shortening for applesauce in stead. This won't change
the flavor of the recipe at all and it will increase the moistness of the
recipe, an added benefit! |
|
|
|
|
|
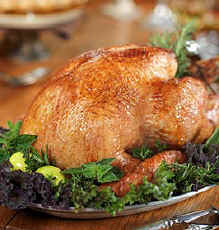
Turkey Roasting
and Safety Hints
|
Refrigerator Thawing: When thawing a turkey in the refrigerator
allow approximately 24 hours for each 4 to 5 pounds in a refrigerator set at 40
°F or below. Place the turkey in a container to prevent the juices from
dripping and contaminating other foods. A thawed turkey can remain in the
refrigerator for 1 or 2 days before cooking. Foods thawed in the
refrigerator can be refrozen without cooking but there may be some loss of
quality. Refrigerator Thawing Times for Whole turkey:
- 4 to 12 pounds …… 1 to 3 days
- 12 to 16 pounds …… 3 to 4 days
|
- 16 to 20 pounds …… 4 to 5 days
- 20 to 24 pounds …… 5 to 6 days
|
|
|
- First of all, get yourself a turkey with a popup timer.
- Put frozen bird in fridge to thaw. Allow 5 days for 20 pounds.
- Only cook a FULLY thawed bird. The day before you intend to cook
it, remove all the stuff and feel inside. If it's still partially
frozen, completely cover with cold water to finish thawing.
- Completely wrap thawed bird in plastic wrap and refrigerate until
ready to cook.
- NEVER stuff a bird and allow to sit in the fridge. Stuff just
before you cook it. (Note: Do not
over stuff!)
- Completely rinse bird inside and out.
|
- Rub butter or margarine all over turkey to cover all the skin,
salt & Pepper it. For extra flavor, rub some between meat and
skin. You can add fresh parsley between meat and skin if desired.
- Pour 1-3 Cups cold water or cold broth in roasting pan with turkey. If not
stuffing, you can put the water or broth right in the cavity. This
is for added juiciness.
- Cook upside down for extremely moist turkey breast as all the juices
will run through
the breast (which will be on the bottom)
- Cover roasting pan tightly, you can use heavy duty foil if no lid
is available.
- Don't keep opening oven door as this will cause cooking time to
change drastically. No need to check turkey until it is near its
time.
- Put turkey in 400° oven for 1 hour, or 450° for 40 minutes.
Reduce to 325° and continue roasting at this temp. Turn oven back
up to 400° the last hour. Flip bird breast side up and continue
roasting without cover or loose cover if turkey is already browning,
until done.
- Turkey cooking times are as fallows: 13-15 minutes per pound
un-stuffed. Add 15-30 minutes more if stuffed. All times are approximate.
The USDA website says we no longer have to cook a turkey to 180°,
So now its juicier!! Internal turkey temp should reach 165° and
stuffing in bird temp should reach 160°.
UN-STUFFED
(time in hours)
- 8 to 12 lbs ………… 2 3/4 to 3
- 12 to 14 lbs ………… 3 to 3 3/4
- 14 to 18 lbs ………… 3 3/4 to 4 1/4
- 18 to 20 lbs ………… 4 1/4 to 4 1/2
- 20 to 24 lbs ………… 4 1/2 to 5
|
STUFFED (time
in hours)
- 8 to 12 lbs …… 3 to 3 1/2
- 12 to 14 lbs …… 3 1/2 to 4
- 14 to 18 lbs …… 4 to 4 1/4
- 18 to 20 lbs …… 4 1/4 to 4 3/4
- 20 to 24 lbs …… 4 3/4 to 5 1/4
|
- 4 to 6 lb breast …… 1 1/2 to 2 1/4
|
- 6 to 8 lb breast …… 2 1/4 to 3 1/4
|
|
|
|
|
|
|
|
Pie
Tips |
- To add a richer color to a double-crust or lattice-topped pie, brush the top crust with milk or lightly beaten egg before baking.
- Baking a pie with a raw fruit filling will take about an hour. Always bake pies on a baking sheet to prevent spillovers in the oven. Berry, apple, and pear pies cook for approximately 45 minutes. When using a pre-cooked filling, pies can bake at a higher temperature for a shorter period of time, just enough to thoroughly bake the crust and heat the filling.
- To check the doneness of the filling, insert a knife into the center of the pie. If it meets with little or no resistance, the pie is done. If the pie is not quite done but the top or edges are becoming too dark, loosely cover the top of the pie with aluminum foil to shield it from the heat. A glass pie dish is a great way to ensure the bottom crust is fully baked; using a baking stone or pizza stone is another trick. Baking on a stone ensures that the bottom crust on even the juiciest fruit pie will be done when the top is brown.
- For shine and sparkle, thin a quarter cup of light corn syrup with very hot water. When the pie is done, brush the thinned syrup over the top of the crust. You can add granulated sugar or decorative sugar at this time. Return the pie to the oven for two to three minutes to let the glaze dry and set. Once the pie is done baking, carefully remove it from the oven. Let the pie cool to room temperature before slicing to allow the filling to set.
- Some of the best pie crusts are made with a combination of fats: half butter, for flavor, and half shortening or lard, for flakiness.
- A little bit of acid--vinegar or lemon juice--helps tenderize the dough and prevents it from oxidizing.
- For a sweeter crust, add a tablespoon or two of confectioners' sugar. Granulated sugar can make the dough sticky and harder to work with.
Other additions: Wheat germ, a pinch of spice, a dash of flavorful liqueur or cold brewed coffee are all good additions to pie crusts.
- When you "cut in" the fat, you want discrete pieces (pea-sized) that don't blend in to the dough as you work it. These flakes of butter will expand and the liquid evaporate during baking, separating the layers of dough into a flaky crust.
- Do not overwork the dough. Mix quickly and handle the dough as little as possible. Overworking the dough will cause it to be tough.
- Chill the dough in the refrigerator for at least 30 minutes before rolling it out.
- Use a dry pastry brush or a clean dishtowel to brush off excess flour from the dough.
- Once the dough is rolled to the proper thickness, fold it in half or roll it around your rolling pin to lift it into the pie pan. Gently press the dough down into the bottom edges of the pan. You can use kitchen shears or a paring knife to trim the crust to about a ¾ inch overhang.
- After the rolled-out dough has been transferred to the pie pan, let it relax in the refrigerator for another 20-30 minutes before filling. This will prevent the dough from shrinking during baking.
|
|
|
|